
How to Configure Roles and Permissions in the Admin Panel
Define what each profile can view, create, modify, or delete to protect information and adapt the panel to the team's functions.
-
Step 1
Open the Roles Module
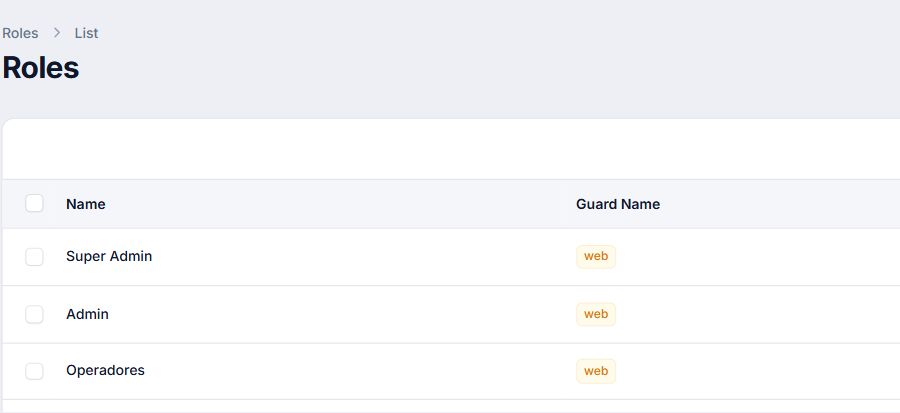
In the sidebar menu, open «Filament Shield» and select «Roles». From the list, you can review existing profiles and start a new configuration.
-
Step 2
Create a New Role
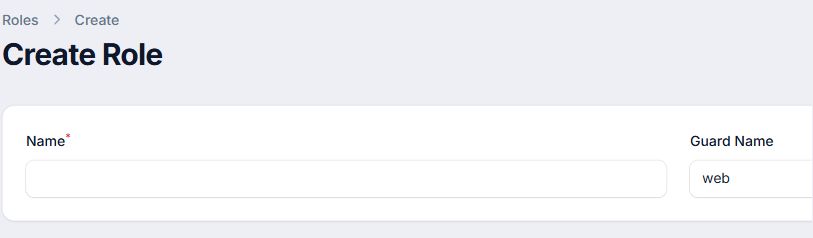
Click «New Role». Write a descriptive name related to the team's function and keep «web» as Guard Name unless there is a different technical configuration.
-
Step 3
Choose the Permission Areas
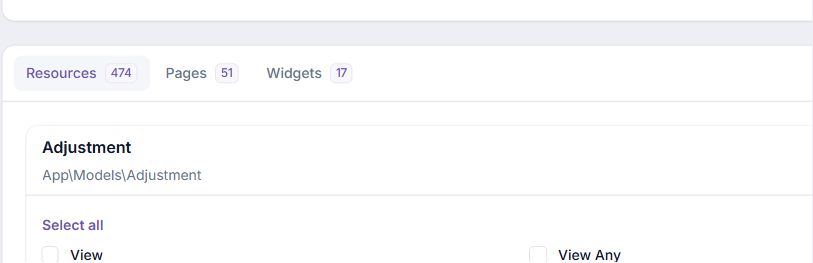
Use the «Resources», «Pages», and «Widgets» tabs to locate the areas of the panel. Select only the modules that the profile needs to perform its work.
-
Step 4
Assign Permissions with Minimum Access
For each resource, enable actions like View, View Any, Create, or Update as appropriate. Grant Delete, Delete Any, and Force Delete only to responsible profiles. Review the selection and save the role.
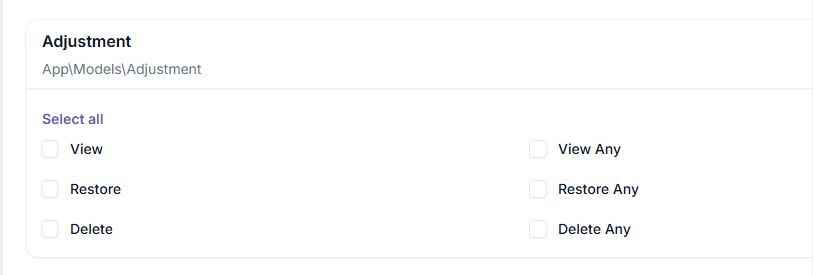
Apply the principle of least privilege: grant only the necessary permissions for each position. Avoid modifying the Super Admin role without a previous review.